 Drastic's 2110Scope, HDRScope, and 4KScope products provide a ScopeDirect OpenIO plugin for Avid that allows users to monitor the main output directly from Avid Media Composer software without SDI/HDMI or IP Video being used to connect them. You can take advantage of this feature to analyze the signal through the wide range of signal analysis tools. This article describes how to set up the ScopeDirect OpenIO plugin output though our scopes.
ScopeDirect analysis is supported in 4KScope, HDRScope, and 2110Scope. Use our Waveform/Vectorscope, Histogram, Chromaticity, a selection of audio scopes, as well as a per-pixel data view and onboard error log to review and confirm levels as you work. Here are the steps to set up this feature.
When you install 4KScope, HDRScope, or 2110Scope on a system with Avid installed, it installs a plugin so Media Composer can send its output to our scopes for analysis.
Note on macOS Installs: Windows installs place the plugins automatically. On macOS you have to add the manually. Select "Show Contents" on Drastic apps. Inside are directories with the zip files.
To install for Avid, unpack [DrasticScope_OpenIO.zip] /Applications/4kScope.app/Contents/Resources/DrasticScope_OpenIO.zip
to
/Library/Application Support/Avid/OpenIO/
Here is how to use the ScopeDirect plugin:
Start a new Avid Project. Use settings that match the clip you plan to use. (frame size, interlaced/progressive)
In the Source Browser window link the test clip.
Create a sequence to play from the timeline.
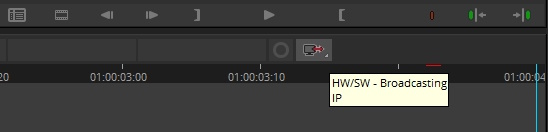
Right click the HW/SW button. Confirm OpenIO_ScopeDirect is selected.

Click on the HW/SW button to turn it on. You should see the red arrow flashing.
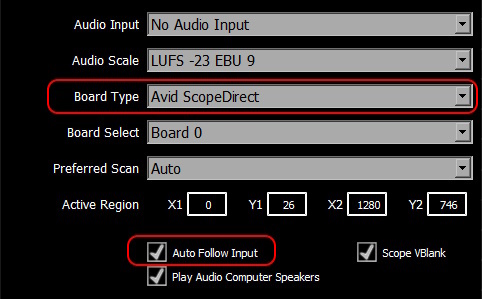
Run the Drastic signal analysis software (example shown is HDRScope). Open the Settings window. Set the Board Type to Avid ScopeDirect and check the Auto Follow Input box.
Play the clip from the Media Composer video window - record side, or scrub through the clip on the timeline.
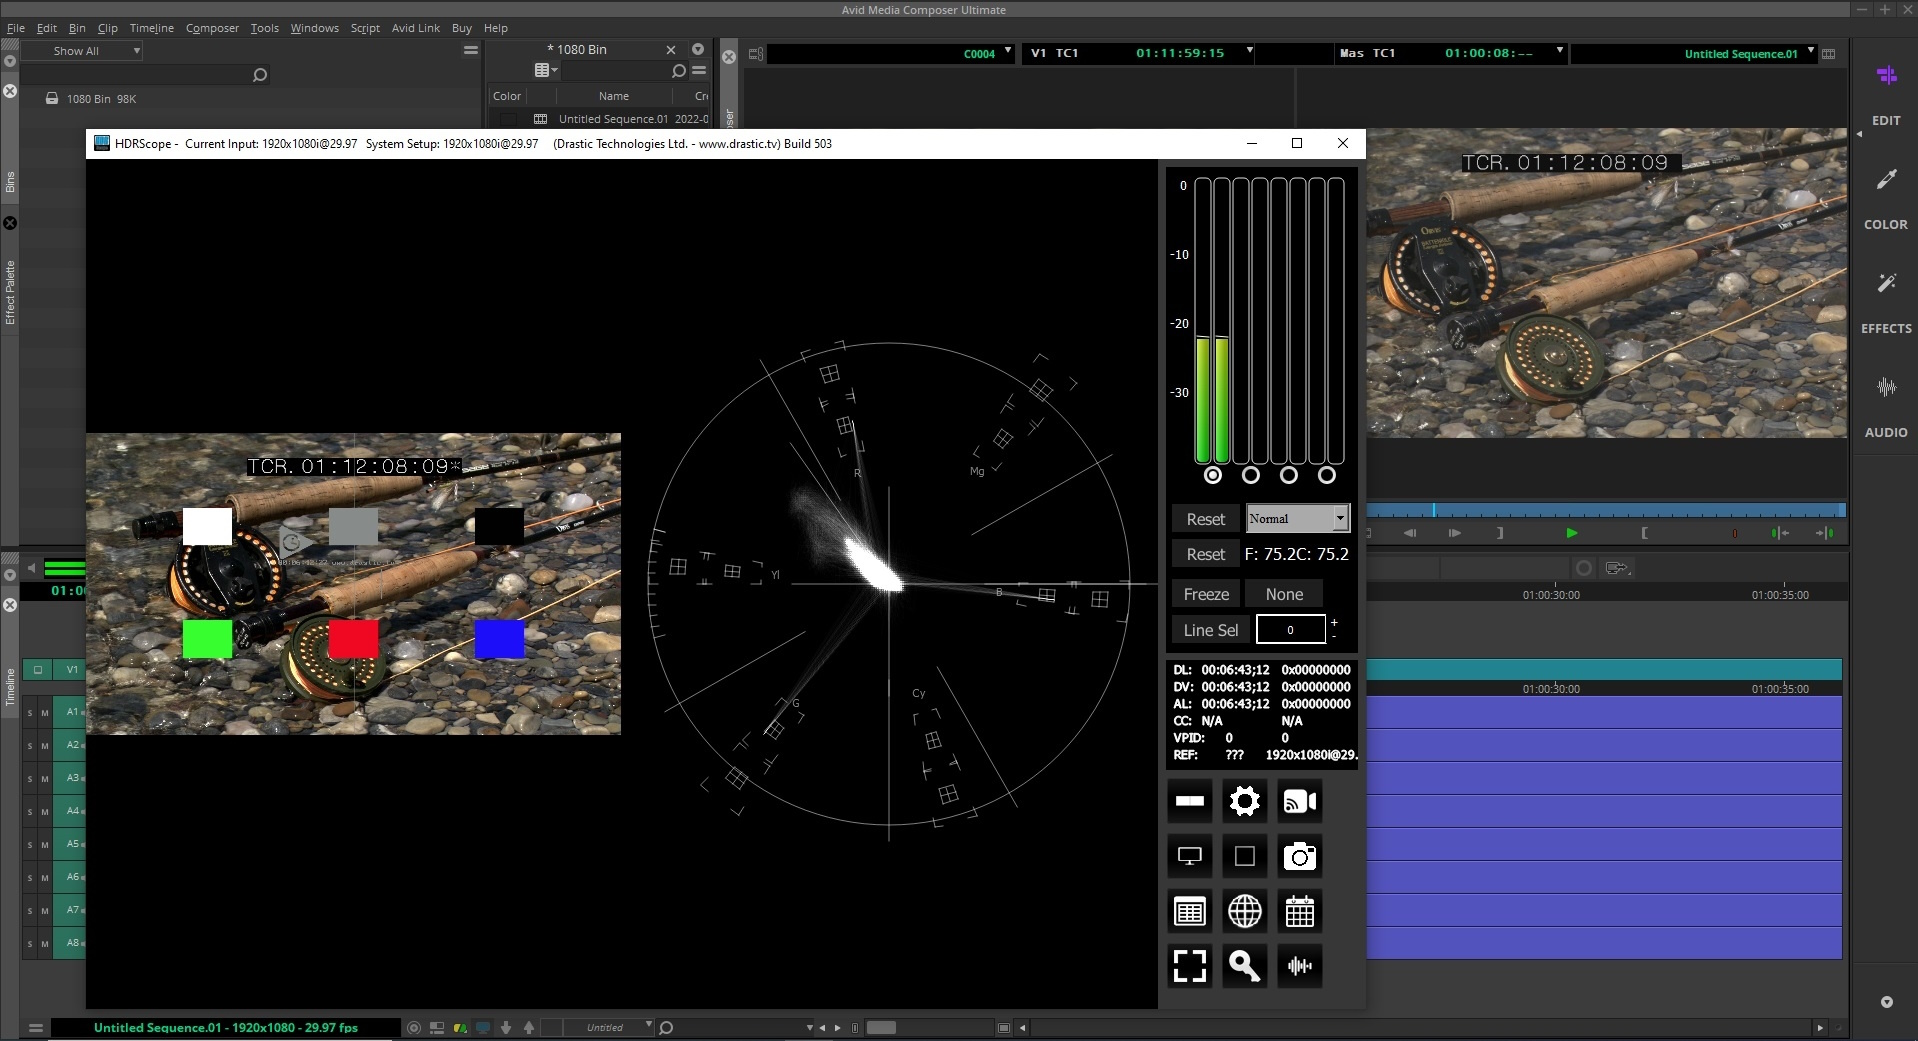
*vectorscope is displaying unlicensed HDRScope
With Auto Follow Input checked, HDRScope will change its settings to match the clip and you will see the test clip settings in the top title bar.
![]()
There is a similar feature offered in Adobe software called Transmitter - view the article here.
Trademarks, Registered Trademarks, and CopyrightsTrademarks, Registered Trademarks, and Copyrights
Avid Technology, Inc. - Avid Media Composer®, Avid MediaCentral®, Avid Interplay®, and Avid NewsCutter® are either trademarks or registered trademarks of Avid Technology, Inc. or its subsidiaries in the United States and/or other countries.
Drastic Technologies, Ltd. – Drastic Technologies, Ltd. – trademarks specified here.