 videoQC Inspect and videoQC Workstation include the ability to re-wrap, convert and export all, or parts, of files they have loaded. This article explains how to set up profiles, set start and end points, and export to new files.
videoQC File Export
To export a file, or part of a file, from videoQC, you will first need to open it. Once it is opened in the player, select the "export media" menu.
![]()
This will bring up the 'Export Media' dialog, which provides controls for setting in and out points, accessing the profiles menu, substituting closed caption or alternate audio tracks, and setting the export in motion.
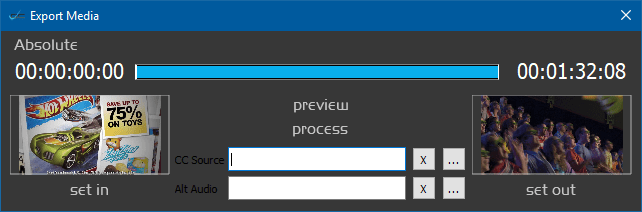
The entire clip can be exported, or a portion of the clip can be specified to create a subclip. The first and last frames will be displayed in the two thumbnails. These can be set by playing the clip, finding a suitable In and/or Out point, and clicking the 'set in' or 'set out' buttons. The area to be exported can be played with the preview button, and optionally, different audio or closed caption files can be substituted.
To select a closed caption file, click the CC Source label, and navigate to the CC file to select it.
To select an audio file, click the Alt Audio label, and navigate to the audio file to select it.
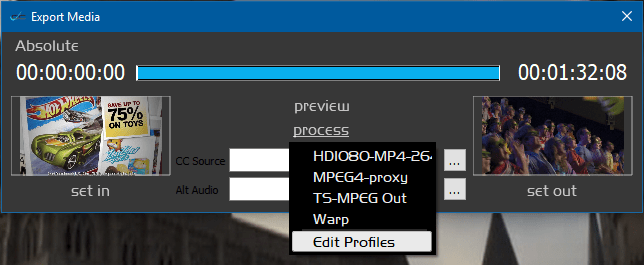
To start the actual conversion or re-wrap process, click on the process label. If you you have already made presets, you can select one and the conversion will begin in the background. If you have not created any profiles, you can create them with 'Edit Profiles'.
videoQC can export to a range of audio/video formats, as well as various types of data or information files.
Supported Export Profiles |
||
| ACES Image Files | this is an information request | |
| cardinfo | this is an information request | |
| clipfiles | this is an information request | |
| dir | this is an information request | |
| DNxHD | 1080p 25, 29, 30 | |
| DNxHD | 720p 50, 59, 60 | |
| DNxHD | 1080i 25, 29, 30 | |
| DNxHR | 10 Bit | |
| DNxHR | HQ | |
| DNxHR | SQ | |
| examine | this is an information request | |
| getCopyInOut | this is an information request | |
| h264 transport stream | MOV ProRes LT | |
| md5 | this is an information request | |
| metadata | this is an information request | |
| MKV | FFV1 Lossless | |
| MOV | MPEG-2 50 4:2:2 | |
| MP3 | bit rate 128k | |
| MP4 | any resolution with a target bitrate of 10 mbs | |
| MP4 | any resolution with a target bitrate of 7.5 mbs | |
| MP4 | any resolution with a target bitrate of 5 mbs | |
| MP4 | HD360p with a target bitrate of 1.25 mbs | |
| MP4 | HEVC Any resolution...target bitrate of 10 mbs | |
| MP4 | Multiple MP4 Output | |
| MP4 | Scaledown to 480x2... target bitrate of 500kbits | |
| MP4 | Scaledown to 960x5... target bitrate of 2mbits | |
| MP4 | Sony XAVC-S 4:2:0 | |
| MP4 | Sony XAVC-S 4:2:2 | |
| MP4-DASH | MP4 Multibitrate | |
| MXF | AS-02 h.264 50 mbs | |
| MXF | AS-11 HD DPP | |
| MXF | Avid Media DNxHD 1080 Writer | |
| MXF | Avid Media HQX 10 Writer | |
| MXF | Avid Media Low Quality Writer | |
| MXF | Avid Media Proxy Writer | |
| MXF | Avid Media Standard Quality Writer | |
| MXF | Avid Media Uncompressed Writer | |
| MXF | Avid Media XDCam Writer | |
| MXF | Avid Media High Quality Writer | |
| MXF | OP1a DVCPro HD 1080i | |
| MXF | OP1a DVCPro HD 720p | |
| MXF | OP1a h.264 | |
| MXF | OP1a HBR 264 10 bit 50mbs | |
| MXF | OP1a HDF 50 4:2:2 | |
| MXF | OP1a JPEG-2000 4:2:2 | |
| MXF | OP1a MPEG 50 4:2:2 | |
| MXF | OP1a XDCam 1080i 35 4:2:0 | |
| MXF | OP1a XDCam 1080i 50 4:2:2 | |
| MXF | OP1a XDCam 1080p 35 4:2:0 | |
| MXF | OP1a XDCam 720p 35 4:2:0 | |
| MXF | OP1a XDCam 720p 50 4:2:2 | |
| MXF | RDD-25 Proxy Writer | |
| picon | creates a small jpg image | |
| QuickTime | DVCProHD | |
| QuickTime | MOV h264 | |
| QuickTime | MOV ProRes 4:4:4 | |
| QuickTime | MOV ProRes HQ | |
| QuickTime | MOV ProRes LT | |
| QuickTime | MOV ProRes Proxy | |
| QuickTime | MOV ProRes XQ | |
| QuickTime | MOV YCbCr 8 Bit | |
| TS | TR-01 JPEG-2000 (special setup required) | |
| TS-h264 | h.264 4:2:0/passthrough transport stream (special setup required) | |
| TS-HLS | Multibitrate (special setup required) | |
| TS-MPEG2 | MPEG-2 4:2:2:...rough transport stream | |
| WAVE | audio only | |
| Wrap clip | same as source | |
| xmp | this is an information request | |
Note: in Net-X-Code and MediaReactor, we support almost any combination of datarate and size, but exporting from videoQC we have a fixed list. For MP4/h264 we support:
960x540@2Mb
480x270@500Kb
360x640@1.25Mb
720x1280@2.5Mb
1920x1080@5Mb
Full Res@5Mb
Full Res@7.5Mb
Full Res@10Mb
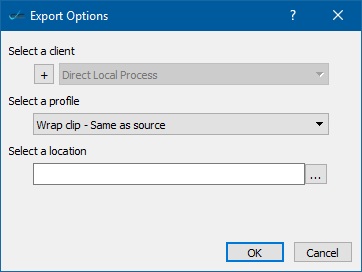
The edit profiles menu will bring up the Profile Editor dialog
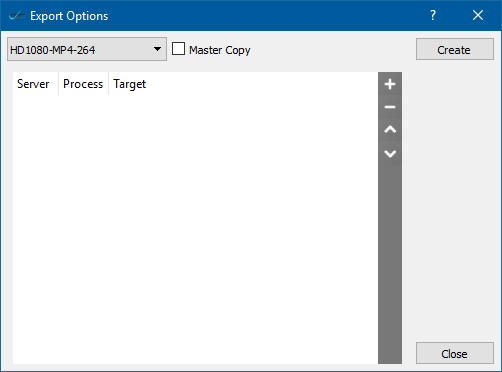
From here you can make a new profile by clicking the Create button. You can also select an existing profile and edit it.
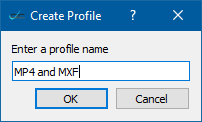
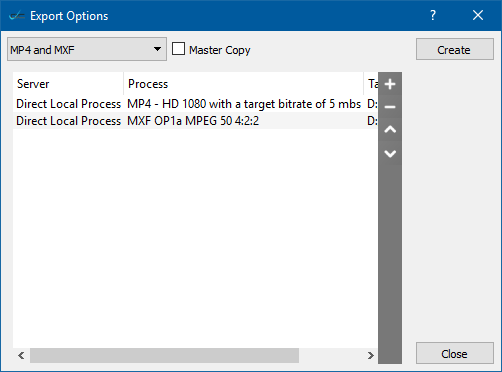
When you click 'OK', the new profile will be added and selected so you can add conversions to it. This will also be the profiles' name in the process menu. To add a conversion to a profile, click the '+' button. This opens the Export Options window.
This dialog allows you to set a target directory and the kind of conversion you want. Below is the profile dialog after adding an MXF XDCam and MP4 Proxy conversion to it. In this case, when you select this profile, it will create both an MP4 and an MXF from the original file. Any number of conversions can be set up in a single profile.
Once the profile editor is closed, the new profile(s) will show up in the process menu. Selecting it will cause the conversions to start.
Trademarks, Registered Trademarks, and CopyrightsTrademarks, Registered Trademarks, and Copyrights
Drastic Technologies - trademarks specified here.
GoPro, Inc. - Cineform® is a trademark or registered trademark of GoPro, Inc.
MPEG LA - MPEG LA licenses patent pools covering essential patents required for use of the MPEG-2, MPEG-4, IEEE 1394, VC-1, ATSC, MVC, MPEG-2 Systems, AVC/H.264 and HEVC standards.
Omneon Video Networks, Inc - Omneon is a trademark of Omneon Video Networks, Inc
Sony Corporation – Sony, Sony DVD Architect, DVD, Catalyst, and Vegas are trademarks of Sony Corporation and/or its affiliates.
All other trademarks are the property of their respective owners.